Are you looking for a smart way to organize your firearms safely and save space? Installing a corner gun rack might be the perfect solution for you.
It keeps your guns secure, easily accessible, and out of the way, making your room look neat and tidy. You’ll learn simple, step-by-step instructions to install a corner gun rack quickly and correctly. Whether you’re a beginner or just want to improve your storage, this guide will help you get it done right the first time.
Keep reading to transform your space and protect your gear with ease!

Choosing The Right Corner Gun Rack
Choosing the right corner gun rack is important for safety and convenience. The right rack keeps your firearms secure and organized. It also fits well in your space and matches your style. Consider different factors before buying a corner gun rack. This helps you pick the best option for your needs.
Types Of Corner Gun Racks
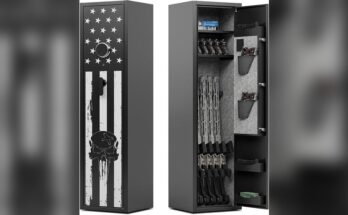
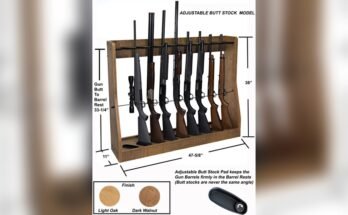
Corner gun racks come in many styles. Wall-mounted racks save floor space and keep guns visible. Freestanding racks offer more storage and can be moved easily. Some racks hold rifles only, while others fit pistols too. Choose a type based on your collection size and room layout.
Materials And Durability
Gun racks are made from wood, metal, or plastic. Wood racks look classic and blend with furniture. Metal racks are strong and last longer. Plastic racks are lightweight and affordable but less durable. Pick a material that fits your budget and lasts long. Durability matters for safety and protection.
Size And Capacity Considerations
Size is key for fitting your guns properly. Measure your corner space before buying. Capacity means how many guns the rack holds. Count your firearms and add room for new ones. A rack too small causes crowding. Too big wastes space. Find a balance for neat storage and easy access.

Gathering Necessary Tools And Materials
Gathering the right tools and materials sets the stage for a smooth corner gun rack installation. Preparing everything beforehand saves time and avoids frustration. It also ensures the rack fits securely and looks great. This section covers the key tools and supplies needed to get started.
Essential Tools For Installation
Start with a power drill for making holes quickly and accurately. A screwdriver, either manual or electric, will help secure screws tightly. Use a level to keep the rack straight and balanced in the corner. A tape measure is necessary to mark exact spots on the wall. Pencil or marker is useful for making these marks clearly. A stud finder locates wall studs for strong mounting support. Finally, have a hammer ready for any adjustments or nails.
Additional Supplies To Have Ready
Keep extra screws and wall anchors nearby for added stability. Sandpaper smooths any rough edges on the rack before installation. Safety gear like gloves and goggles protects hands and eyes. A small step stool or ladder helps reach higher corners safely. Clean cloth or rag wipes dust and debris off the wall and rack. Having these supplies on hand makes installation easier and safer.
Preparing The Installation Area
Preparing the installation area is a key step before mounting your corner gun rack. This process helps ensure the rack fits well and stays secure. Taking time to prepare saves effort later and improves safety.
Start by choosing the right corner. Then measure carefully and check the wall structure. These steps make the installation smooth and the rack stable.
Selecting The Perfect Corner
Pick a corner that is easy to reach but not in the way. Avoid corners near heat sources or damp areas. A dry and cool corner keeps your guns safe. Ensure there is enough space around the rack for easy access.
Measuring And Marking Placement
Use a tape measure to find the exact spot for the rack. Mark the spots where screws will go with a pencil. Double-check your measurements to avoid mistakes. Accurate marks help keep the rack level and secure.
Checking Wall Structure
Identify what type of wall you have—drywall, plaster, or wood. Use a stud finder to locate studs behind the wall. Mounting the rack on studs offers better support. Avoid weak areas like hollow spots without support.
Mounting The Corner Gun Rack
Mounting the corner gun rack is a key step to keep your firearms secure. It needs careful work to hold the rack firmly. This process protects your guns and keeps the rack steady. Follow the steps below to install it properly and safely.
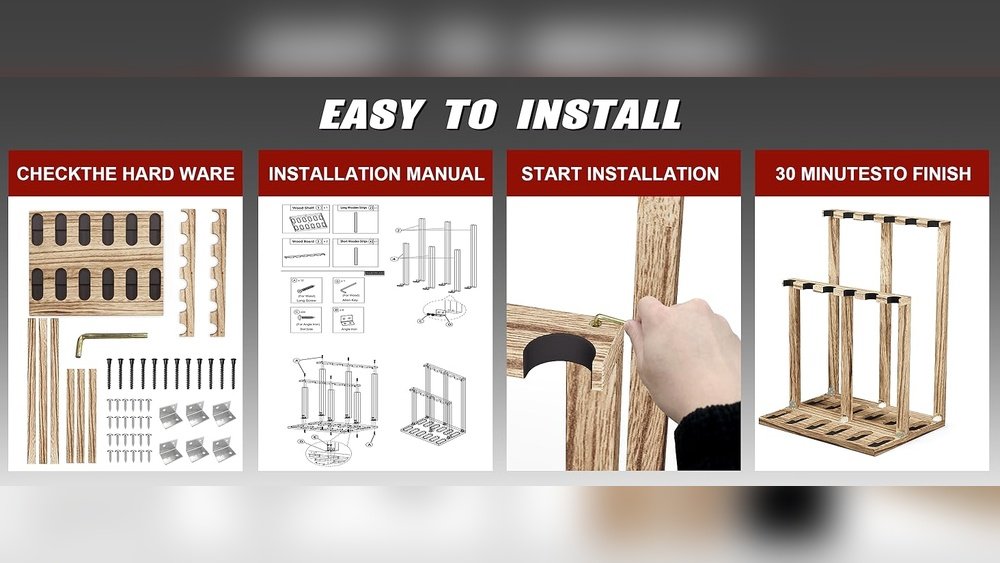
Drilling Pilot Holes
Start by marking the spots for screws on the wall. Use a pencil to make small marks through the rack’s holes. Choose a drill bit smaller than the screws. Drill pilot holes at the marked spots. These holes guide screws and prevent the wall from cracking.
Securing The Rack To The Wall
Place the rack against the corner with the holes aligned. Insert screws into the pilot holes. Use a screwdriver or drill to tighten screws firmly. Do not over-tighten to avoid damage to the rack or wall. Make sure the rack feels fixed and solid.
Ensuring Stability And Alignment
Check if the rack is level using a spirit level or a ruler. Adjust screws slightly if the rack is not straight. Press on the rack gently to test stability. It should not wobble or move. Tighten screws further if needed. A stable rack keeps your guns safe and organized.
Final Adjustments And Safety Tips
Final adjustments and safety tips are key to secure your corner gun rack. These steps keep your firearms safe and your rack sturdy. Take time to check everything carefully before use.
Double-checking Fasteners
Check all screws and bolts once more. Tighten any loose fasteners with a screwdriver or wrench. Secure fasteners prevent the rack from wobbling or falling.
Look for stripped or damaged screws. Replace them if needed. This helps keep the rack strong and safe for your guns.
Organizing Firearms Safely
Place firearms in the rack with care. Store guns unloaded and pointed in a safe direction. Arrange guns so they do not touch each other.
Use foam padding or soft liners to protect gun finishes. Keep ammunition separate and locked away from the rack. This lowers risk and improves safety.
Maintaining The Gun Rack
Clean the rack regularly to avoid dust buildup. Check fasteners and wood condition every few months. Tighten or repair parts as needed.
Keep the rack in a dry place to stop rust or wood damage. Proper maintenance extends the life of your gun rack and keeps firearms secure.

Frequently Asked Questions
How Do I Choose The Right Corner For My Gun Rack?
Select a corner with sturdy walls and enough space. Avoid high-traffic areas to prevent accidents and ensure easy access.
What Tools Are Needed To Install A Corner Gun Rack?
You’ll need a drill, level, screws, anchors, a pencil, and a measuring tape for precise installation.
How High Should I Mount A Corner Gun Rack?
Mount the rack about 5 to 6 feet high. This height is safe, accessible, and keeps guns out of children’s reach.
Can I Install A Corner Gun Rack On Drywall?
Yes, but use wall anchors or locate studs to ensure the rack holds securely without damaging drywall.
Conclusion
Installing a corner gun rack is simple and saves space. Follow each step carefully for safety. Use the right tools to make the job easier. Place the rack where it fits well and feels secure. Keep your guns organized and easy to reach.
Regularly check the rack to keep it steady. Enjoy having a neat and safe gun storage spot. This small project improves your room and gun care.