To install a gun safe on a tile surface, ensure a solid foundation and use a drill with a masonry bit. Protect the tile when drilling to avoid cracks and consider professional help for secure installation.
Ensuring the security of firearms is paramount for any responsible gun owner. A gun safe not only guards against unauthorized access but also protects your firearms from damage. Installing a gun safe on a tile floor, while challenging, is imperative for a sturdy and reliable setup.
Tiles are prone to cracking under stress, so it’s crucial to approach the installation with precision and caution. Homeowners must equip themselves with the right tools and techniques, or opt to hire professionals. This not only enhances safety but also maintains the aesthetic integrity of the flooring. As the demand for home security measures increases, understanding the correct procedure for installing heavy equipment like a gun safe becomes increasingly relevant.
The Importance Of Proper Gun Safe Installation
Keeping a gun safe at home helps protect your family. It locks away dangerous weapons. It is a big deal to put it in the right place. This guide tells you how to do it on a tile floor. We will focus on doing it safely and keeping it easy to use.
Safety Concerns With Incorrect Placement
Putting a gun safe in the wrong spot can be dangerous. It might tip over. This could hurt someone. Or it could break your tiles. Here’s what to think about:
- Balance: The safe should be level on the floor.
- Weight: Tile floors might crack under a heavy safe. Use a strong support.
- Secure: Make sure it does not move to prevent accidents.
Maintaining Accessibility And Functionality
Your gun safe must work well and be easy to get to.
- Location: Choose a spot that’s easy for you but hard for others to find.
- Opening Mechanism: The safe’s door must open without hitting anything.
- Lighting: Make sure you can see the lock clearly.
Follow these steps for a safe and functional gun safe install:
| Step | Action |
|---|---|
| 1 | Pick a Spot: Close to you but hidden. |
| 2 | Measure Space: Ensure safe and door can fit. |
| 3 | Prepare Surface: Use padding to protect tiles. |
| 4 | Position Safe: Keep it balanced and fixed in place. |
Choosing The Right Location For Your Gun Safe On Tile
Securing a gun safe on tile requires careful planning. It’s crucial to find a spot that combines strength with strategical advantage. This ensures both the safe’s stability and easy access in times of need. Let’s delve into the essentials for the perfect location.
Assessing The Strength And Durability Of Tiles
Before installation, assess the tile’s load-bearing capacity. Not all tiles are created equal. Some can easily crack under excess weight. It’s best to consult with a professional to understand the specifics of your flooring.
- Evaluate the thickness of your tile and the underlying support.
- Determine whether additional reinforcement is necessary.
- Consider a supporting board or platform if needed.
Strategic Placement For Quick Access And Visibility
The location of your gun safe should balance quick access with discretion. Opt for a spot that’s both accessible and secure. Here are key points to consider for ideal placement:
| Criteria | Details |
|---|---|
| Near Point of Entry | Close to doors or windows for easy accessibility during emergencies. |
| Low Visibility | Avoid visible locations to reduce the threat of theft or damage. |
| Climate Control | Areas free from moisture and temperature fluctuations protect the safe’s contents. |
Materials And Tools Required For Secure Gun Safe Installation
Installing a gun safe on a tile surface requires precision and the right materials. Proper installation ensures maximum security and stability, protecting not only valuable firearms but also preventing potential tile damage. Before initiating the installation process, having all the necessary tools and anchoring equipment is crucial.
Must-have Tools For The Installation Process
A successful installation hinges on the following tools:
- Drill – To bore holes that align with your safe’s mounting points.
- Masonry drill bits – Specific for tiles to avoid cracking or chipping.
- Hammer – For setting anchors securely in place.
- Level – To ensure the safe is perfectly horizontal.
- Screwdriver – For tightening fasteners and locks.
- Tape measure – To confirm the safe fits the designated spot.
- Pencil or marker – To clearly mark drilling spots.
- Safety glasses and gloves – To protect from debris and sharp edges.
Choosing Anchoring Equipment Suitable For Tile
Selecting the right anchoring equipment is paramount for a firm and safe installation:
| Type of Anchor | Suitability |
|---|---|
| Concrete anchors | Durable option for mounting heavy safes. |
| Anchor bolts | Ensure a tight fit and prevent movement. |
| Epoxy anchors | Best for maximum holding strength. |
Always match the anchor size to the pre-drilled safe holes and the drill bit used for creating mounts on the tile.
Step-by-step Guide To Installing Your Gun Safe
Welcome to the key section of our guide where safety meets precision. You have selected the perfect spot on your tile surface for your gun safe. Now it’s time to securely anchor it. Follow these steps to ensure a sturdy installation without any damage to your tile.
- Locate the holes at the bottom of your safe.
- Place the safe over your desired spot on the tile.
- Use a pencil to mark the tile through each hole.
- Ensure each mark is precise for accurate drilling.
- Now, move the safe aside carefully.
Drilling into tile can be tricky. The right tools and techniques will prevent cracks.
- Use a carbide-tipped or diamond-tipped drill bit for toughness.
- Put masking tape over your marked points. This helps prevent slipping.
- Start drilling at a slow speed to keep the bit from overheating.
- Apply gentle pressure and let the bit do the work.
- If needed, pause to cool the drill bit with water.
- Once through the tile, switch to a bit for concrete if you hit the slab.
- Drill to the depth needed for your anchor bolts.
After aligning the safe and inserting the anchor bolts, tighten them securely. Your gun safe is now properly installed and ready to safeguard your firearms.
Anchoring Your Gun Safe To Tile Flooring
When it comes to ensuring the safety of both your firearms and your household, anchoring your gun safe to your tile flooring is a critical step. A well-anchored safe prevents theft, accidental tip-overs, and increases overall safety. But, securing a heavy object like a gun safe to delicate tile can seem daunting. Fear not, as this guide will help you anchor your safe effectively without causing damage to your stylish tiles.
Securing The Safe To The Tile Without Cracking
The right preparation can prevent tile damage. Begin with assessing your tile and choosing a drill bit designed for tile – a diamond-tipped bit works best. Use a slow drill speed to avoid generating excessive heat that can crack tiles. Mark your drill points using a template and apply masking tape to prevent the drill from slipping. Use a center punch to gently create a guide for the bit. Drill carefully, applying light pressure to prevent cracks.
- Select a diamond-tipped drill bit
- Tape and mark drill points
- Use a center punch to start
- Drill at a slow speed with light pressure
Applying The Right Adhesives For Extra Hold
In addition to mechanical fasteners, using adhesives can provide your safe with extra stability. Consider an epoxy designed for bonding metal to tile. It should be heat and water-resistant to ensure durability. Clean the surface of both the safe and the floor, and follow the adhesive instructions carefully. Once applied, press the safe into its final position and allow ample time for the adhesive to cure before testing the safe.
- Pick a tile-compatible epoxy adhesive
- Clean the surfaces to be bonded
- Mix and apply adhesive according to instructions
- Press the safe down and let the adhesive set fully

Credit: www.amazon.com
Final Checks For Stability And Security
Proper installation of your gun safe on a tile surface adds an extra layer of home security. Now that the safe is in place, let’s ensure it’s as unyielding as Fort Knox. A foundation as sturdy as bedrock is just a few checks away.
Inspecting The Safe For Movement And Gaps
To begin the final checks:
- Push lightly against the safe’s sides. You are testing for movement. Any shift could mean instability.
- Examine the base. Are there any unwanted spaces between the safe and floor? Gaps can weaken your safe’s defense.
- If you detect movement or gaps, reassess the anchoring. Tighten bolts and re-level the safe as necessary.
Ensure the safe’s door opens smoothly and closes securely. You want no resistance or friction points.
Testing Lock Mechanisms Post-installation
Lock testing is critical:
- Operate the lock multiple times with the door open. Listen for any unusual sounds.
- Close and lock the door, then try to open it without entering the code or using the key. The lock should remain secure.
- Verify that digital keypads respond accurately to your input. Make sure there is no lag or sticking.
If the lock fails any test, refer to the manufacturer’s guide or contact a professional.
Perform these checks periodically to ensure ongoing stability and security.
Maintaining Your Installed Gun Safe Over Time
After safely installing a gun safe on a tile surface, attention to maintenance is crucial. Proper care prevents harm to the safe and the surface. Over time, a well-maintained gun safe will ensure consistent protection and functionality.
Routine Checks For Loosening Or Wear
Regular inspections keep the safe secure. Owners should perform these checks monthly:
- Inspect anchors for signs of movement.
- Look for cracks in the tile around the safe.
- Check bolts and fasteners for tightness.
Document findings and take action if needed. Use non-abrasive tools to avoid tile damage during adjustments.
Addressing Humidity And Temperature Changes
Changes in climate can affect your gun safe. Regular monitoring of humidity and temperature is key.
| Climate Factor | Action Item |
|---|---|
| High Humidity | Place dehumidifiers inside the safe. |
| Low Humidity | Check for over-drying, which can cause brittle metal parts. |
| Temperature Fluctuations | Insulate the safe, if necessary, to maintain a consistent internal climate. |
Keep a thermometer and hygrometer handy. They help track changes inside the safe. React promptly to any climate shifts to protect the contents.
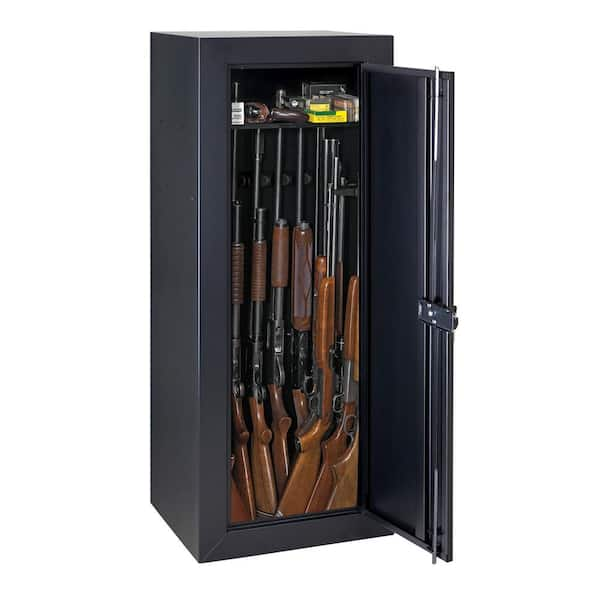
Credit: www.homedepot.com

Credit: www.libertysafe.com
Frequently Asked Questions Of How To Safely Install Your Gun Safe On A Tile Surface
Can You Put A Gun Safe On Tile?
Yes, you can place a gun safe on tile, ensuring the floor can support the weight. Use a protective mat or base to prevent damage to both the safe and the tile.
How Much Weight Can You Put On Tile Floor?
A tile floor can typically support 250-300 pounds per square inch. Always check the tile specifications and consult a professional for specific weight limits.
What Should A Gun Safe Sit On?
A gun safe should sit on a strong, level surface, ideally concrete, to enhance security and stability. Anchor it for added protection against theft.
Will My Floor Hold A 1000 Lb Safe?
To determine if your floor can support a 1000 lb safe, consult a structural engineer or refer to building codes specific to your floor’s construction. Standard residential floors typically sustain this weight, but professional assessment ensures safety.
Conclusion
Securing your gun safe on a tile floor demands precision and patience. Follow the steps outlined to ensure stability and protection. Remember, opting for professional help is wise for optimal security. Protect your firearms, your family, and your peace of mind with a properly installed gun safe.
